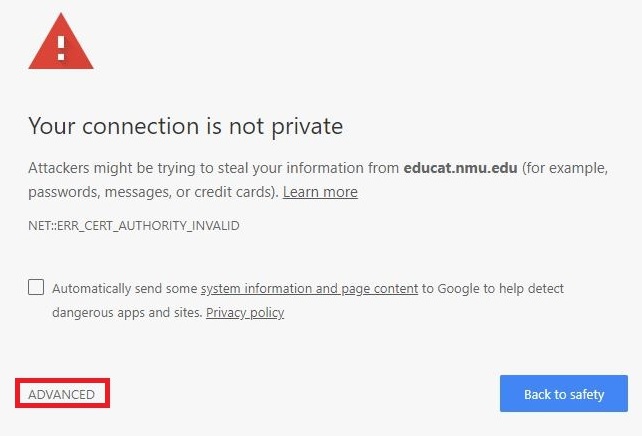
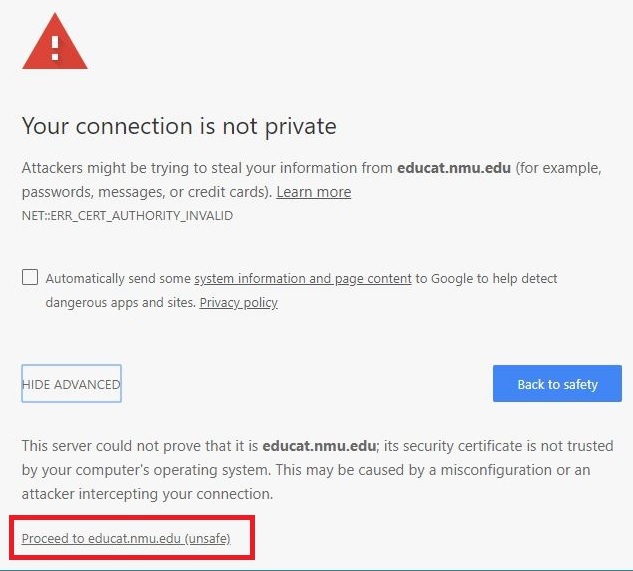
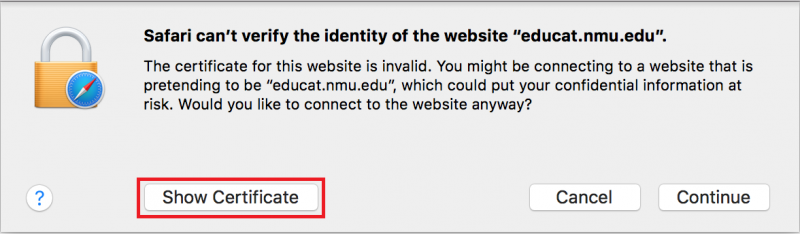
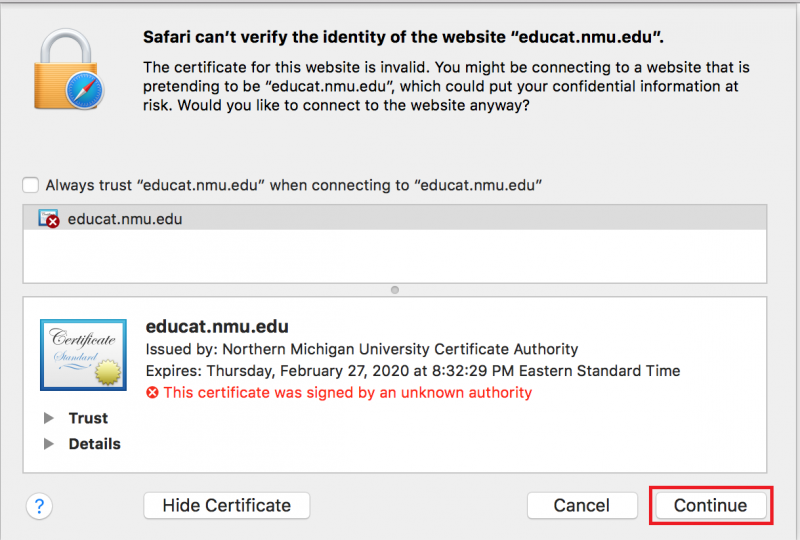
Checking TCP or IP Address Settings
Documentation
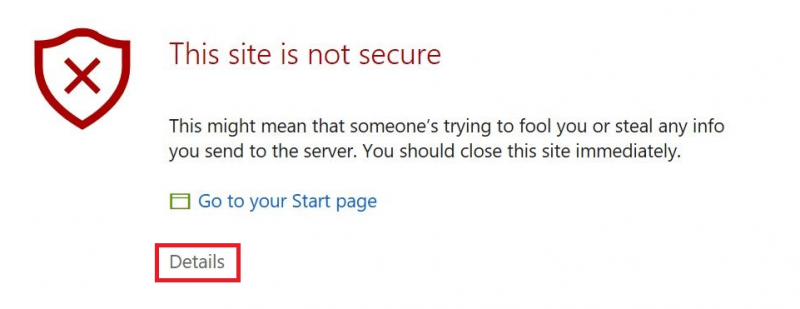
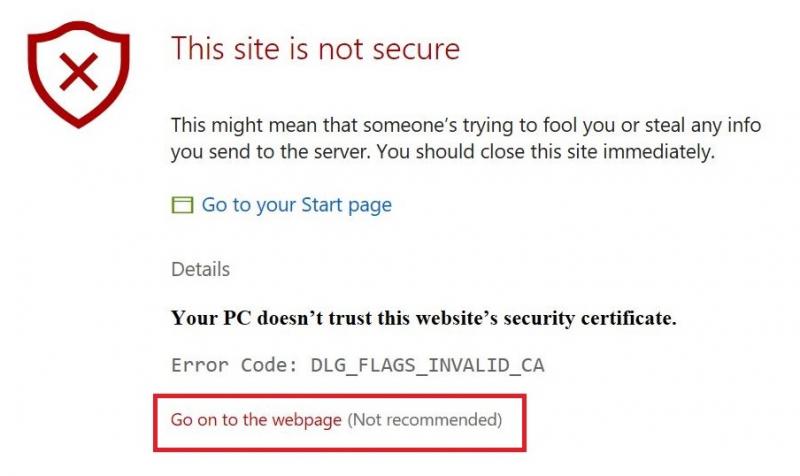
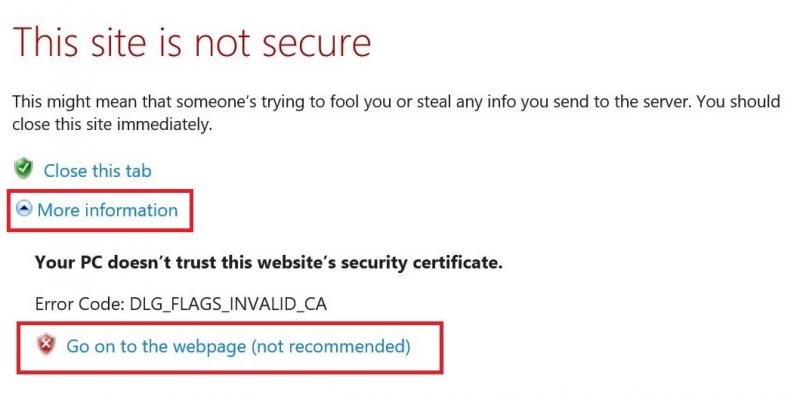
If you're having network issues, it may be a good idea to check your settings. Click below to get started.
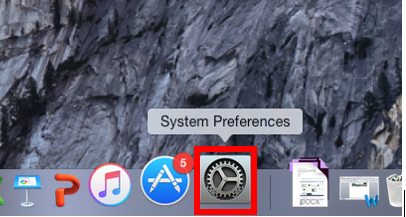
Mac OS X
Windows 10 (Similar to earlier versions)
MAC OS X
1. Click on "System Preferences" on the dock.
2. Click on "Network.
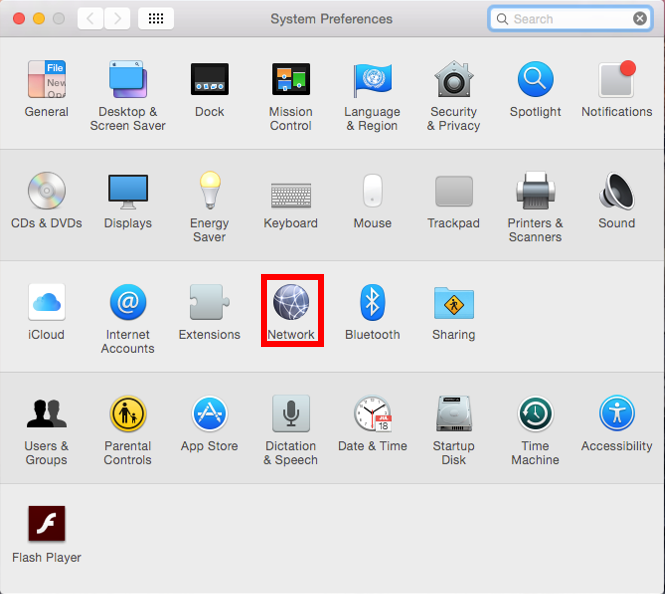
3. To check Wifi settings, click here. To check Ethernet, click here.
WIFI
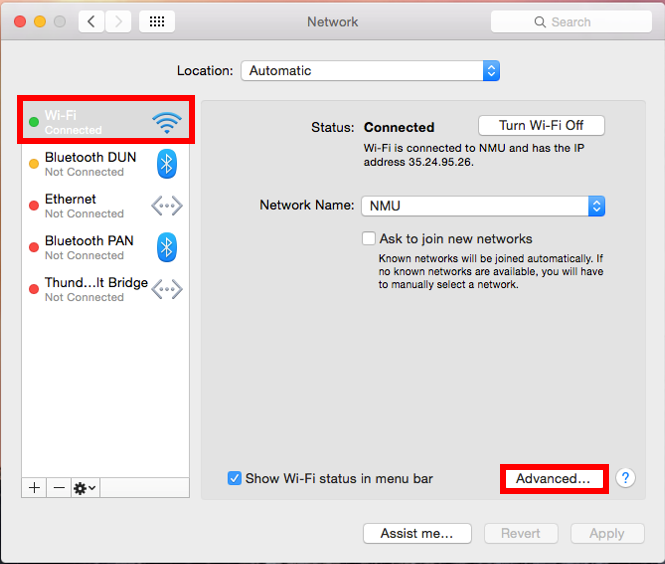
1. Click on "WiFi," then click on "Advanced."
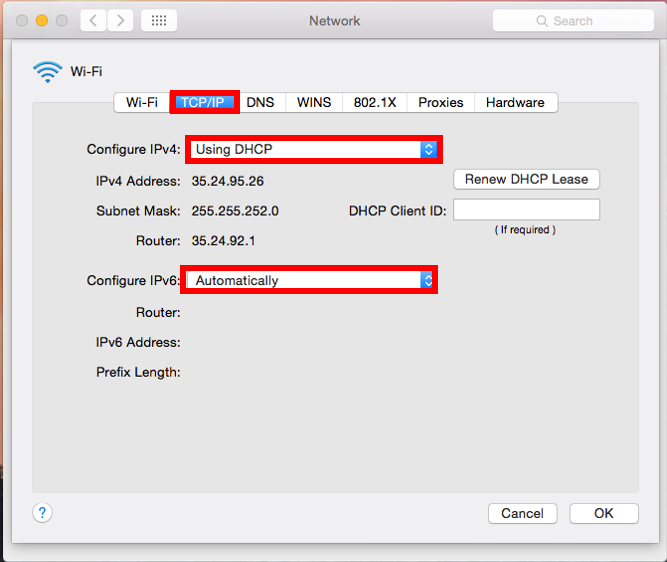
2. In the "TCP/IP" tab, verify that "Configure IPv4" is set to "Using DHCP." Then, verify that "Configure IPv6" is set to "Automatically."
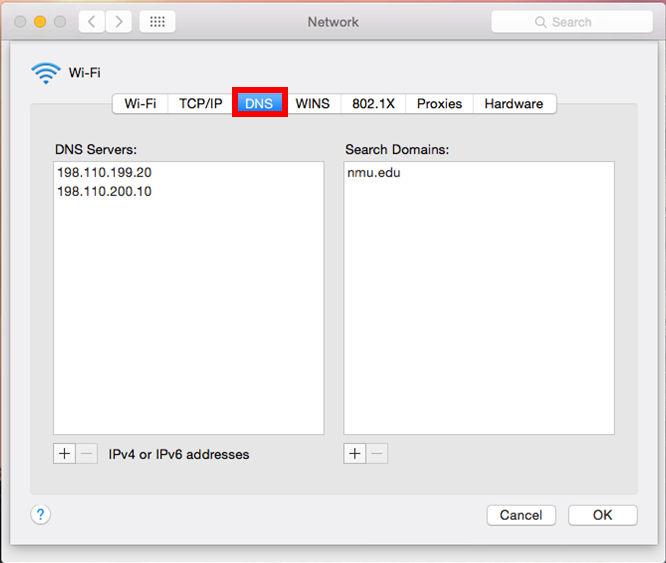
3. Click the "DNS" tab, and verify that the DNS Servers and Search Domains match what is shown below.
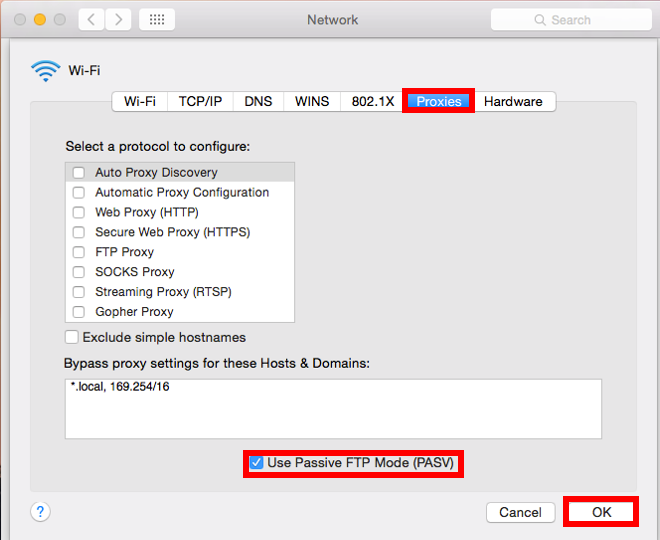
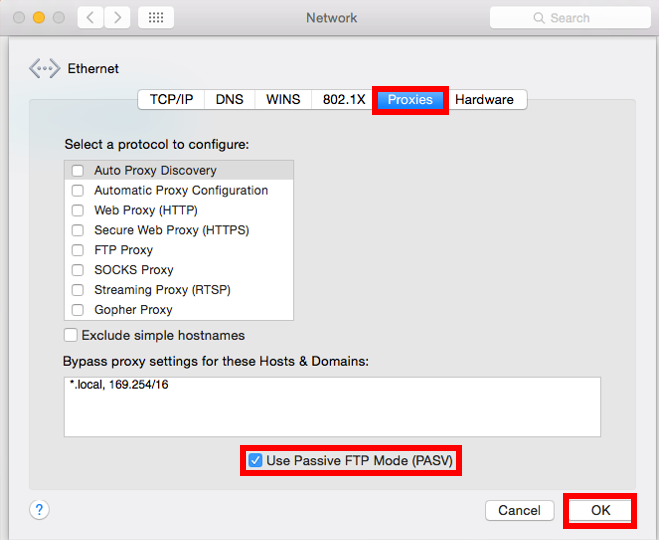
4. Click "Proxies" and be sure that everything is unchecked except "Use Passive FTP Mode (PASV)." Click "OK" to exit.
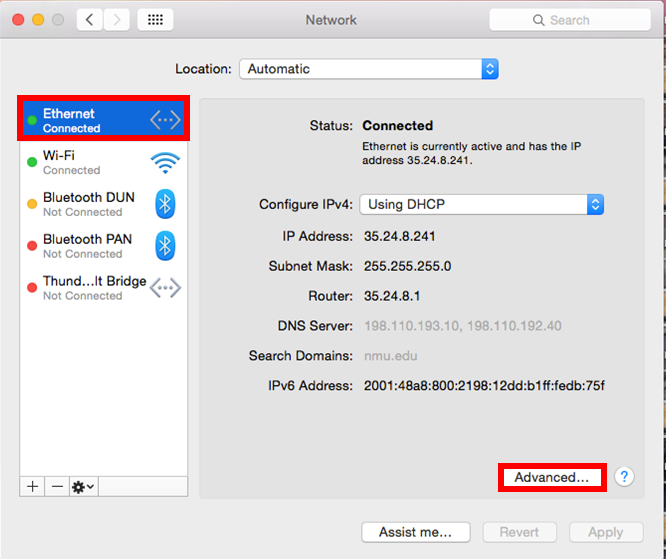
1. Click on "Ethernet" and veryfy that "Configure IPv4 is set to "Using DHCP." Now, click "Advanced.
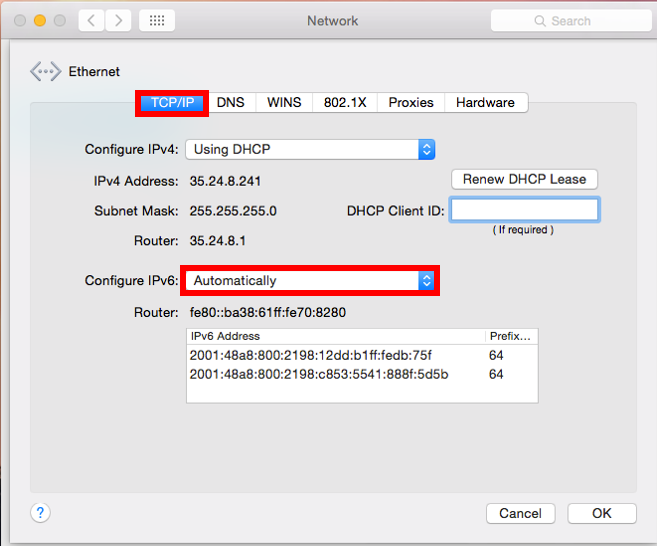
2. In the "TCP/IP" tab, verify that "Configure IPv4" is set to "Using DHCP." Then, verify that "Configure IPv6" is set to "Automatically.
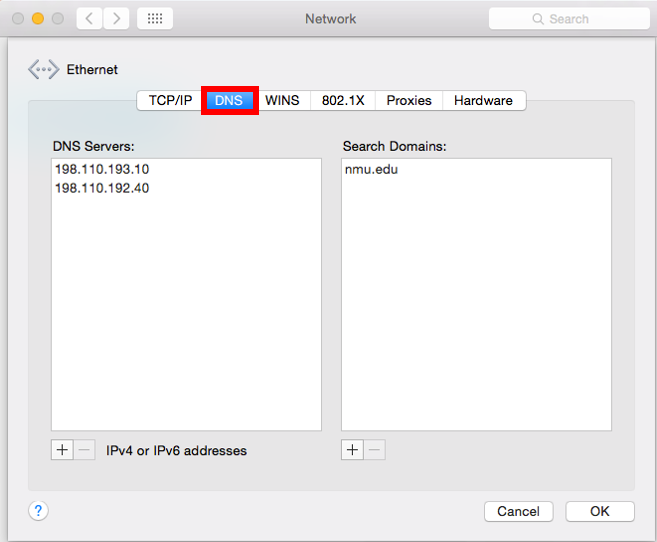
3. Click the "DNS" tab, and verify that the DNS Servers and Search Domains match what is shown.
4. Click "Proxies" and be sure that everything is unchecked except "Use Passive FTP Mode (PASV).
Windows 10
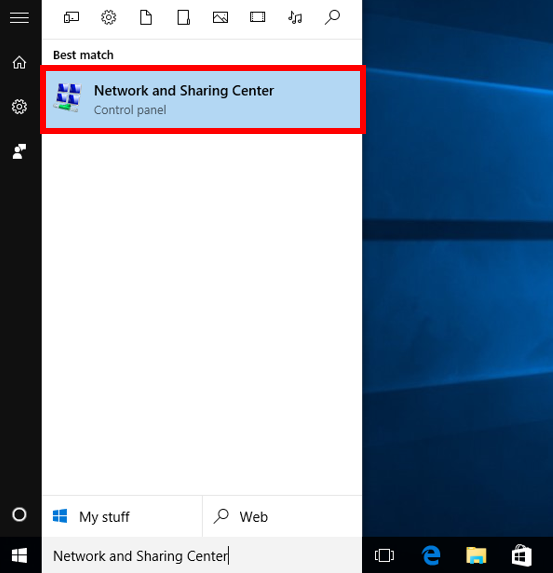
1. In the Start menu or search bar, type "Network and Sharing Center" and select that option.
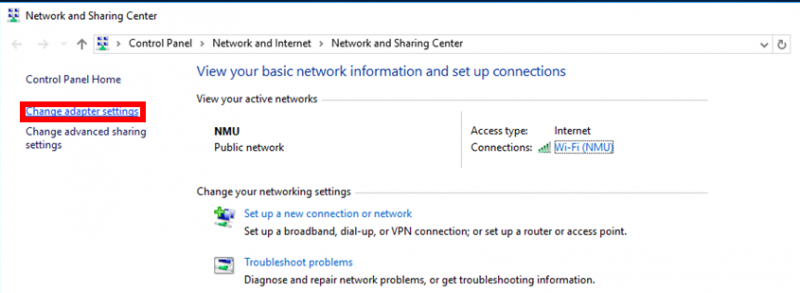
2. Select "Change adapter settings" to the right.
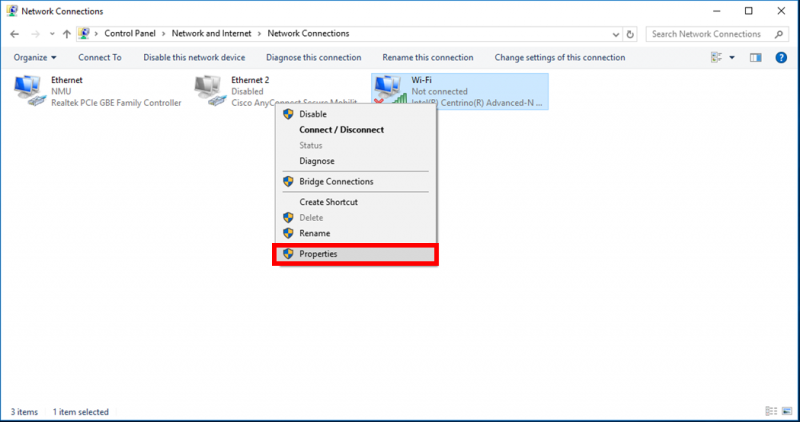
3. Right click the network you'd like to check and select "Properties." The information will be the same for both ethernet and WiFi.
4. In the new window, scroll down to select "Internet Protocol Version 4 (TCP/IPv4)" and click "Properties."
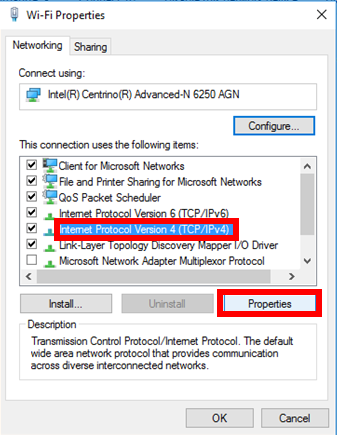
5. Assure that "Obtain an IP address automatically" and "Obtain DNS server address automatically," then click the "Advanced" button.
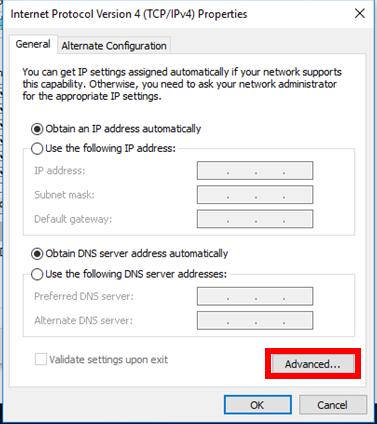
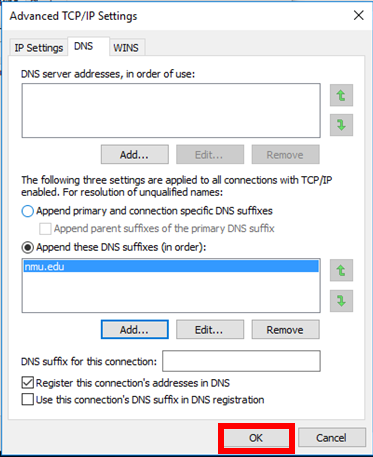
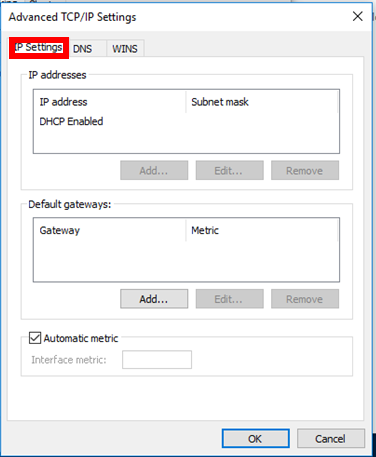
6. Ensure that the settings in the
tab match those shown below.
7. Ensure that the settings in the "DNS" tab match those shown below. Click "OK" to close the window.