Documentation
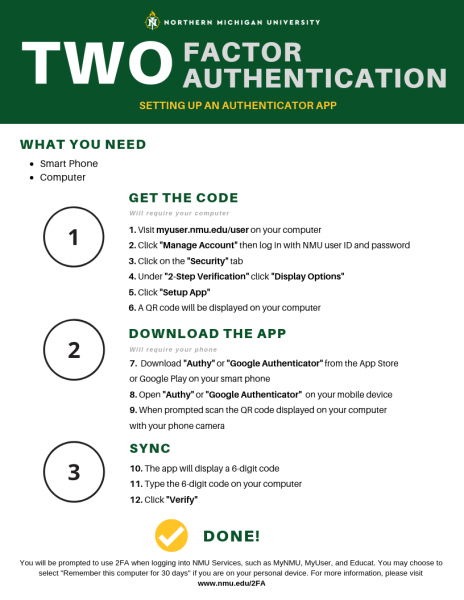
Setting up Google Authenticator for 2 factor authentication
These instructions provide an overview of the process and the process may have changed if the authenticator app was recently updated. If you find you need more assistance than provided here please contact NMU Technology Support Services.
We recommend you set up 2-factor authentication Backup Codes first so you have more than one method of 2-factor authentication to use prior to setting up an Authenticator App.
1. Get the “Google Authenticator” app for your iOS or Android device from the Apple App Store or Google Play.
2. Run the “Google Authenticator” app.
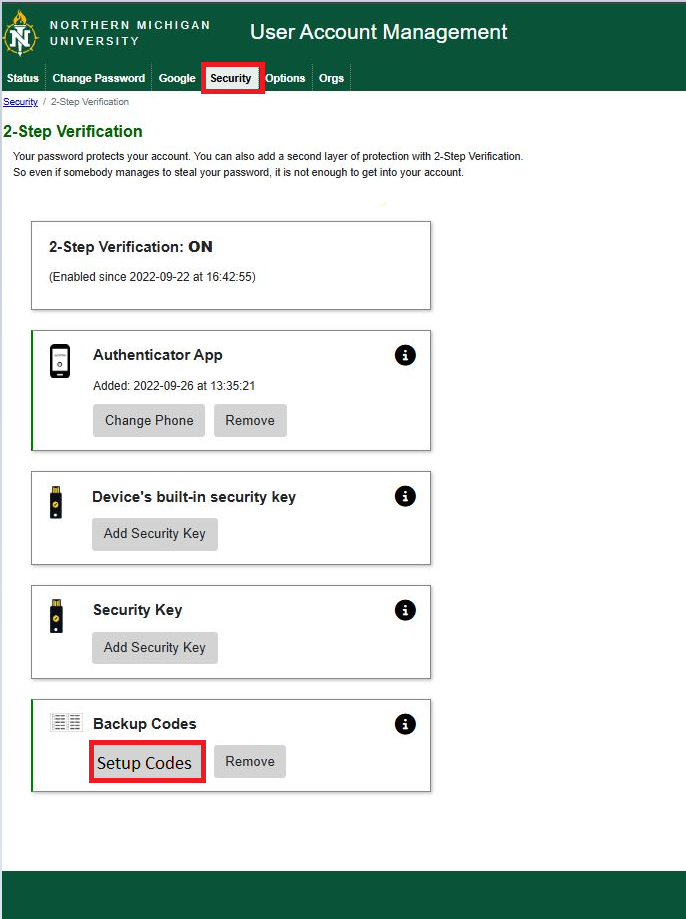
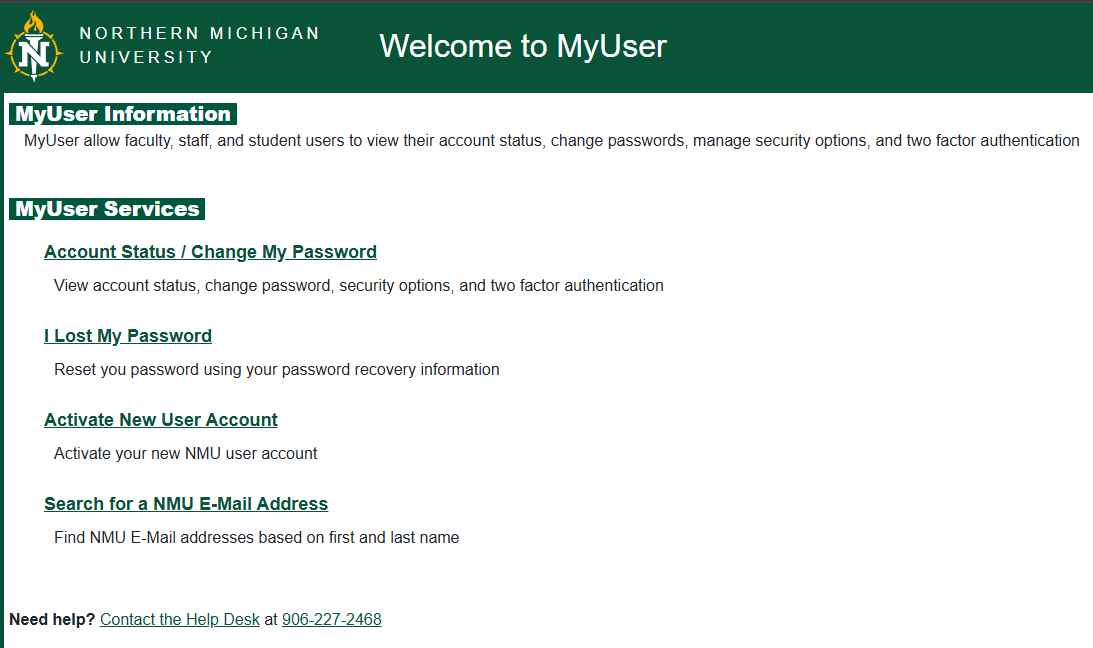
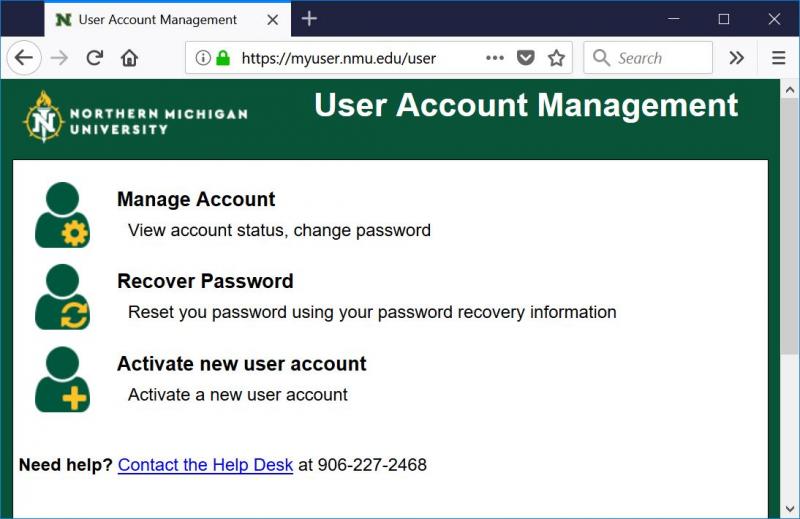
3. On a computer or another device, go to https://myuser.nmu.edu/user, click “Manage Your User Account” and login with your NMU ID and password.
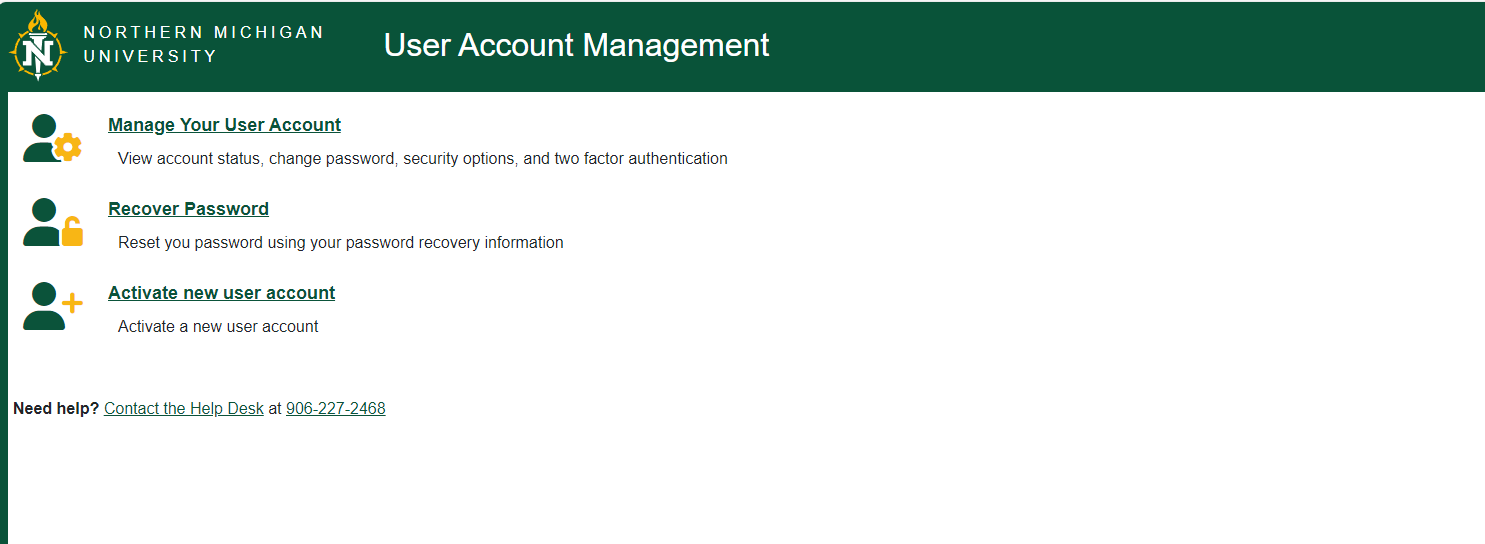
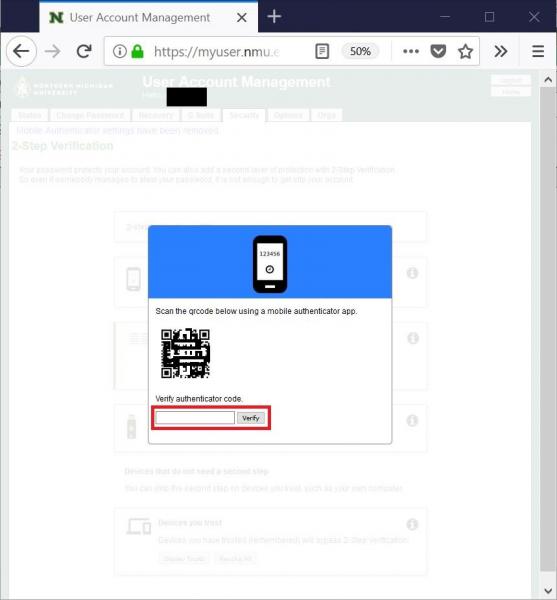
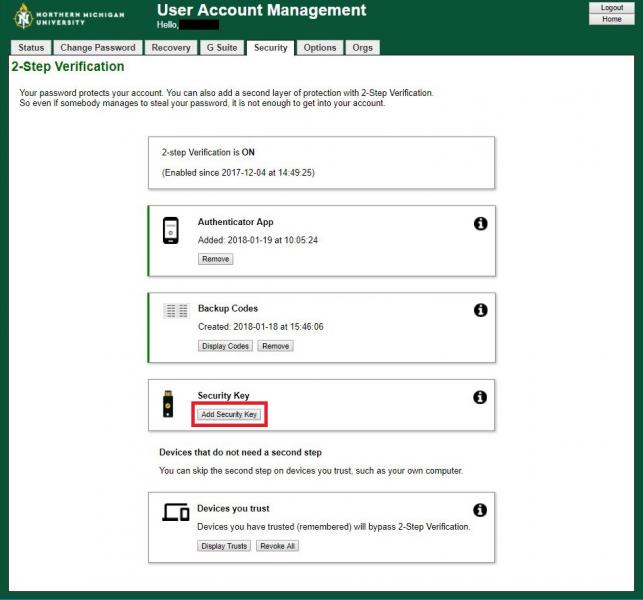
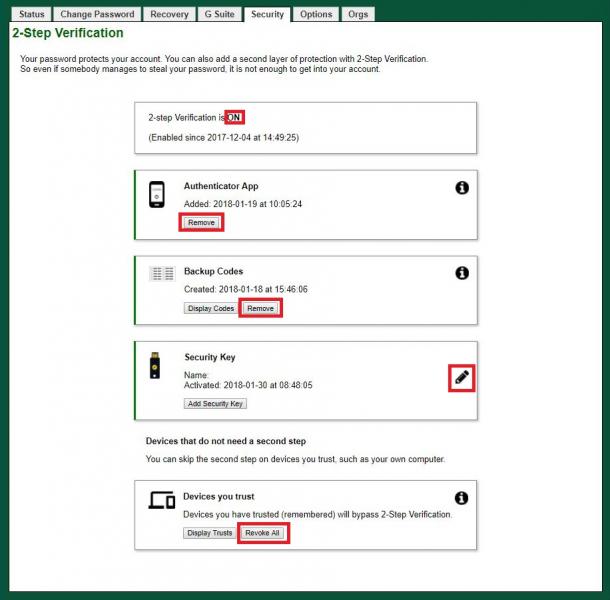
4. Click on the “Security” tab and then the “Display options” button under “2-Step Verification”.

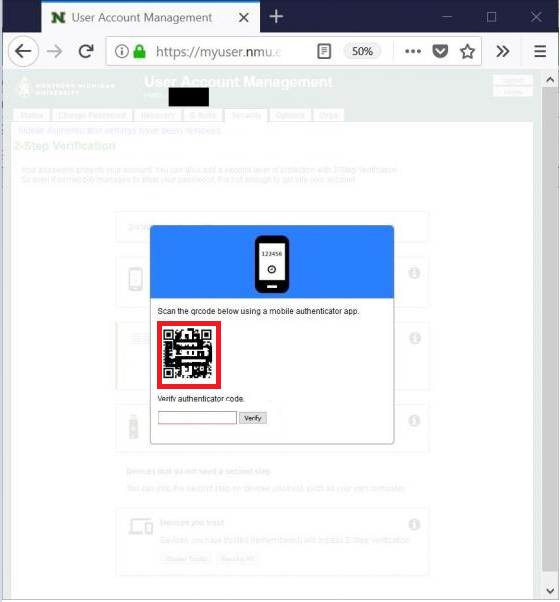
5. Click the “Setup App” button under “Authenticator App”. A QR Code will be displayed. If the “Setup App” button isn't available but a "Remove" button is then an authenticator app has already been configured for your account. If you want to delete the current one and set up the Google Authenticator click the "Remove" button and the “Setup App” button will become available.
6. On your iOS or Android device click the "+" (plus sign) in the upper right of the screen and then the "Scan barcode" option at the bottom.
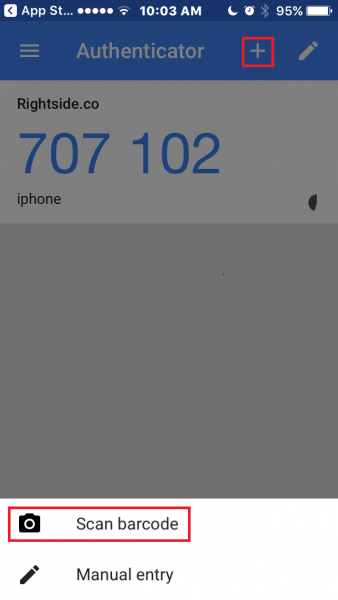
7. Google Authenticator may prompt for you to allow access to the Camera. Click “OK”.
8. Scan the QR Code displayed on the computer or other device.
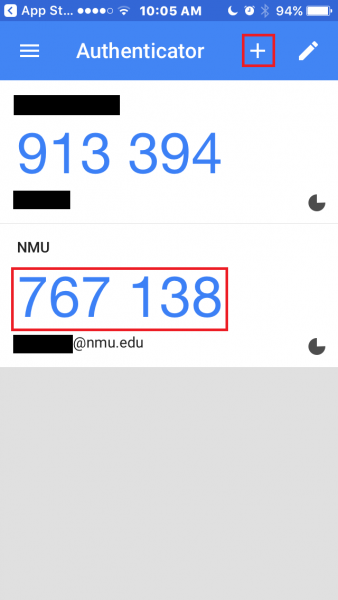
9. Google Authenticator will display NMU, your NMU email address as your account name and your current 6 digit token number. The 6 digit token number renews every 30 seconds.
12. Enter the current 6 digit token number into https://myuser.nmu.edu/user on your computer or another device and click the “Verify” button.
13. The screen will indicate if the app was successfully added and then revert to the previous screen showing the time and date the app was authorized. An email message summarizing the 2-factor authentication will be sent to your NMU email account.
14. Log out of https://myuser.nmu.edu/user.
Using Google Authenticator for 2 factor authentication
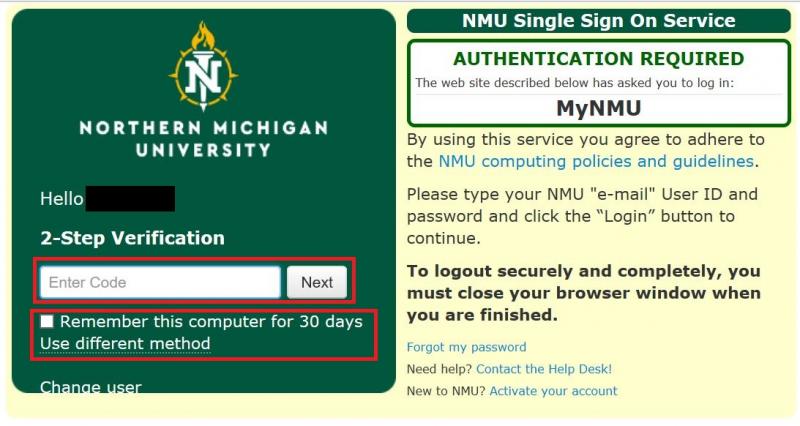
1. When logging into an NMU service such as MyNMU after entering in your userID and password you will be prompted to enter a code for 2-step verification and a checkbox to “Remember for 30 days” if this is a personal device you trust will stay secure and you don’t want to be prompted for the 2-step authentication each time you access the service.
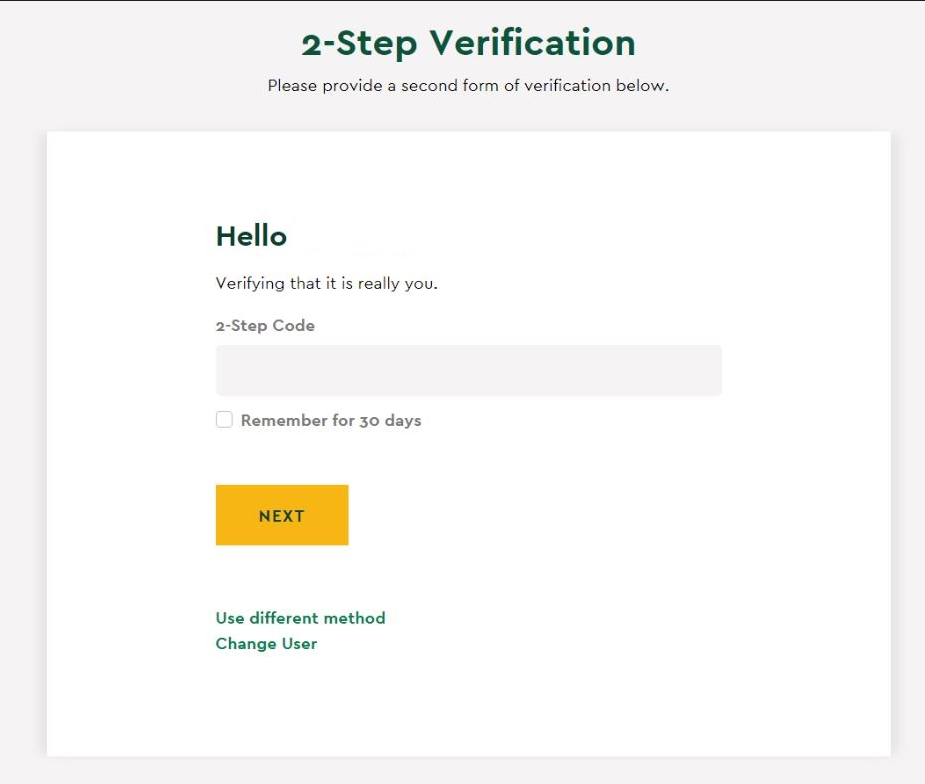
2. Open your Google Authenticator app on your iOS or Android device and enter the current token displayed and click “Next”.


