Rehearsing timings in PowerPoint
Documentation
You can rehearse your presentation to make sure that it fits within a certain time frame. While you rehearse, use the Rehearse Timings feature to record the time that you need to present each slide, and then use the recorded times to advance the slides automatically when you give your presentation to your actual audience.
Be prepared to start delivering your presentation immediately after you complete step 1.
1. Select the "Slideshow" tab, click "Rehearse Timings"
- The "Rehearsal" toolbar appears, and the "Slide Time" box begins timing the presentation.

1. Next (advance to the next slide)
2. Pause
3. Slide Time
4. Repeat
5. Total time for presentation
2. While you time your presentation, do one or more of the following on the "Rehearsal" toolbar:
- To move to the next slide, click "Next"
- To temporarily stop recording the time, click "Pause"
- To restart recording the time after pausing, click "Pause"
- To restart recording the time for the current slide, click "Repeat"
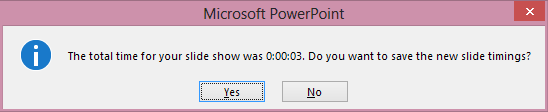
3. After you set the time for the last, a message box displays the total time for the presentation and prompts you to do one of the following:
- To keep the recorded slide timings, click "Yes"
- To discard the recorded slide timings, click "No"
Slide Sorter view appears and displays the time of each slide in your presentation.
Turn the recorded slide timings off before you give a presentation
If you do not want the slides in your presentation to advance automatically by using the slide timings that you recorded, do the following to turn the slide timings off:
- On the "Slide Show" tab on the ribbon menu, clear the "Use Timings" check box.