Connecting to Guest Wireless
Documentation
University guests can connect to the NMU_GUEST Wifi access points without having a university account. These instructions cover the process of connecting and agreeing to the Acceptable Use Policy. To learn more about guest wireless, visit the "Guest Wireless Locations" page.
Connecting with Windows
Connecting with an iPhone
Connecting with Android
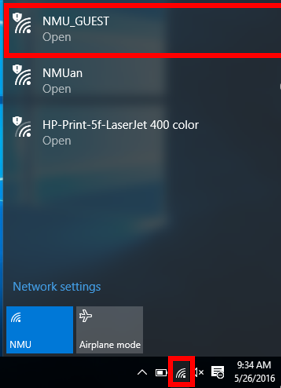
Connecting with Windows
1. Select the Windows wifi connection icon from the system tray to expand the available connections menu. Then, select "NMU_GUEST" from the list.
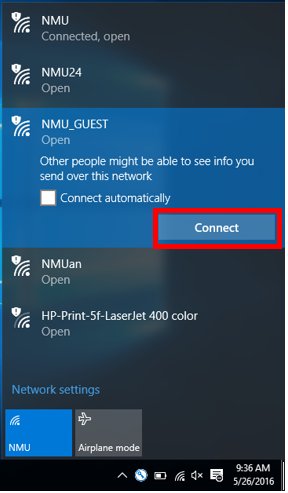
2. Select the "Connect" button.
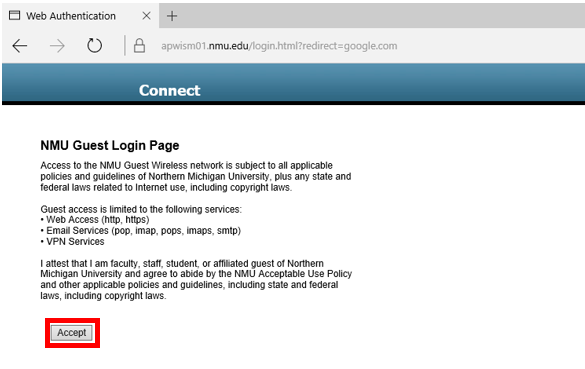
3. Open your internet browser. It should automatically navigate to the guest access page with the Acceptable Use Policy. Read and click "Accept" to gain access.
Connecting with an iPhone
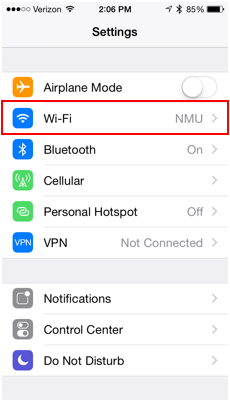
1. Tap the settings icon 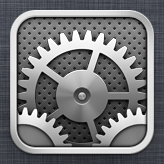 and select "Wi-Fi".
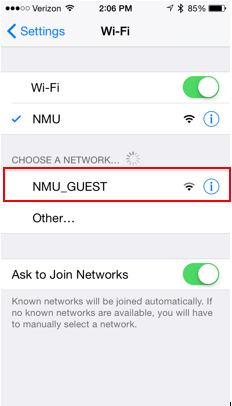
2. Select "NMU_GUEST" under "Choose a Network...".
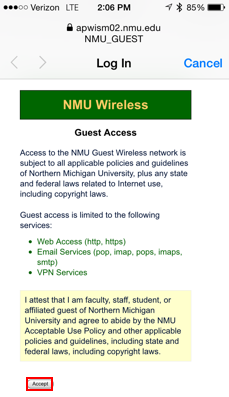
3. Once the device connects to the network, it should automatically open Safari.
4. The "NMU Wireless" page should load with the Acceptable Use Policy. Read the policy and select "Accept".
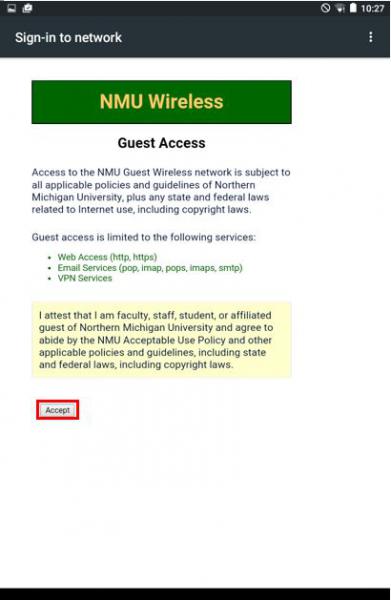
Connecting with Android
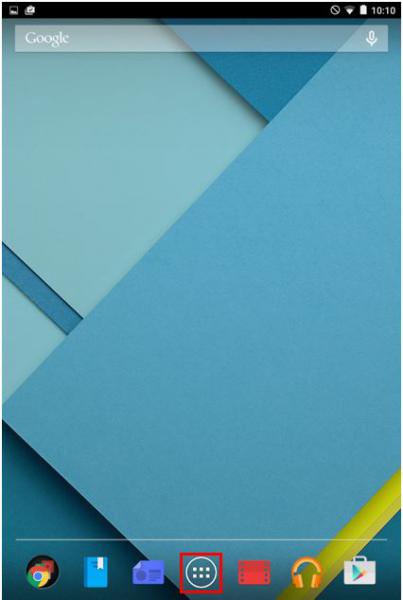
These screenshots utilize a Nexus 7 tablet. Specific screens may vary depending on the device.
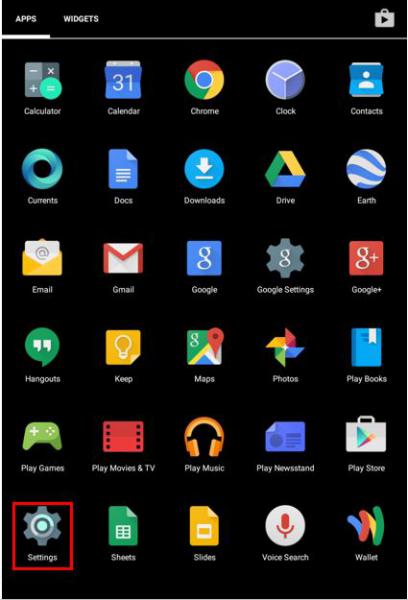
1. Tap the App Tray icon on the main screen to view more applications.
2. Selects the "Settings" icon from the App menu.
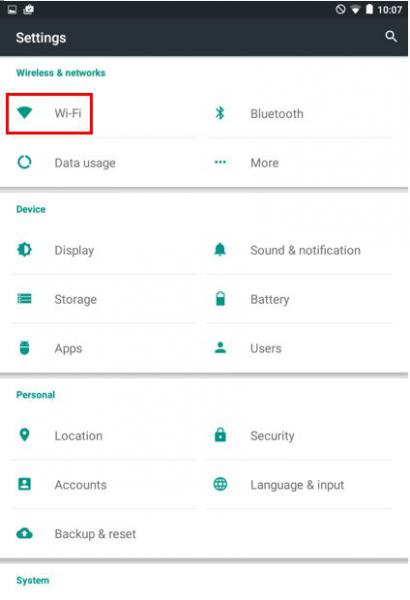
3. Select "Wi-Fi" from the "Settings" menu.
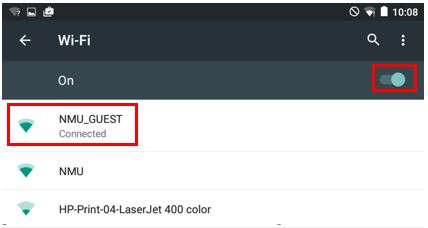
4. Ensure that the Wi-Fi is on in the upper right corner, then select "NMU_GUEST" from the list of available networks.
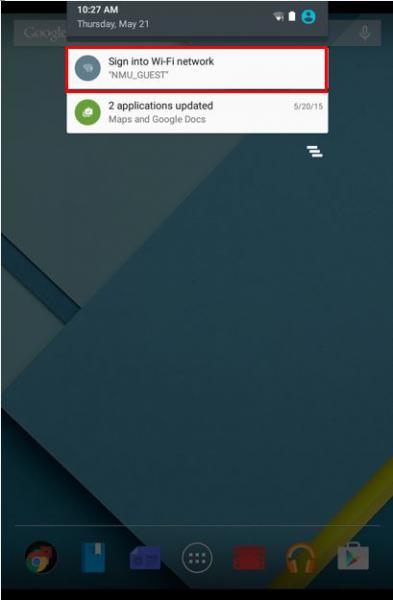
5. Slide down the top menu to select the "Sign into Wi-Fi network" option.
6. Your internet browser will open to the "NMU Wireless" page containing the Acceptable Use Policy. Read the policy and select "Accept."


