Microsoft Office Suite Not Activated

Documentation

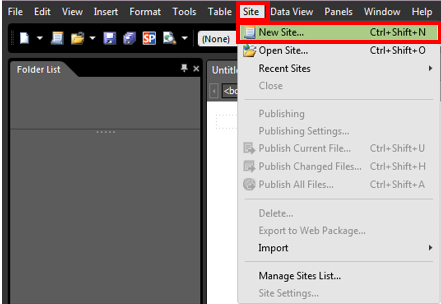
Microsoft Office is configured to activate when you first use it, however sometimes this activation can fail if your time and date are incorrect or you are not connected to an NMU Network. In order for Microsoft Office to activate you have to be connected to an NMU Network such as WiFi, Wired, or LTE. You can connect through the VPN client if you are off campus and have your own internet service provider. If you're getting messages that Office needs to be activated, follow the steps below.  
 

1. You will need to be connected to an NMU network (Wifi, Ethernet, or LTE) to activate. If you are off campus, you can also connect using the VPN client, as detailed on our Starting Windows VPN Client page


2. Once connected to an NMU network, you must first ensure that your date and time are correctly synchronized. It is possible for AM/PM to be incorrect, the date to be wrong, or even for the clock to be off by minutes or seconds.  Ensure your time is correct and change it if it isn't by following the instructions at our "Windows Date and Time Zone Settings" page. 


3. Open "This PC" ("My Computer" in older versions) from your desktop or select it from the navigation pane in Windows file explorer, then select the "Windows (C:)" Drive. 


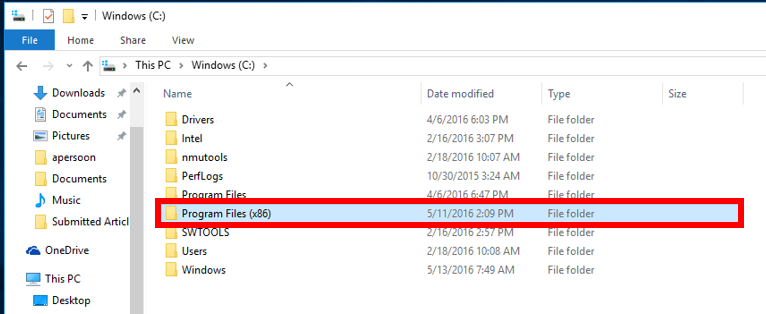
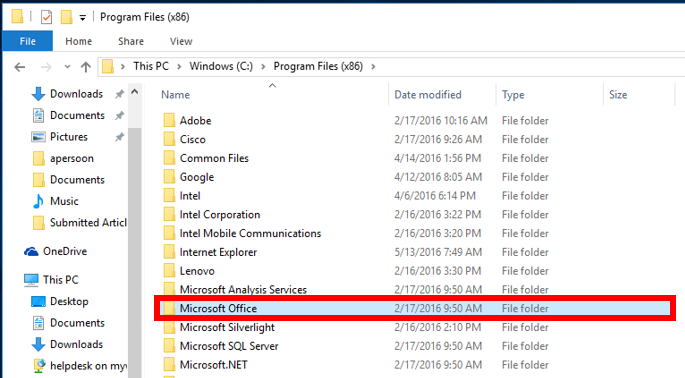
4. Open "Program Files (x86)."


5. Open the "Microsoft Office" folder.


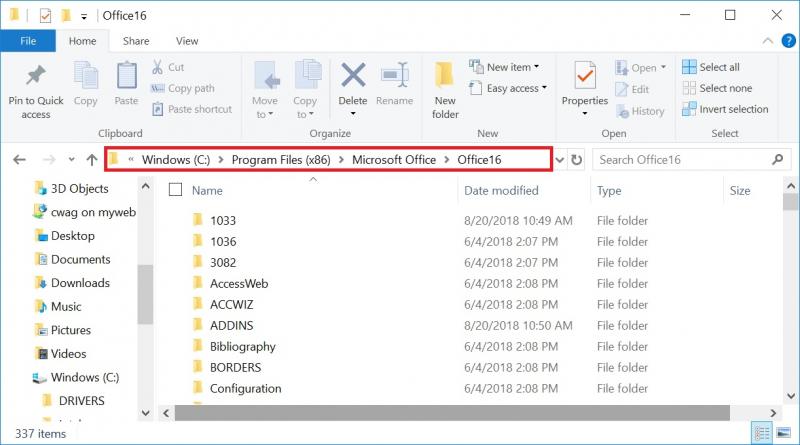
6. Open the folder labeled "Office16." You have to have this folder open in order for the powershell commands to work.


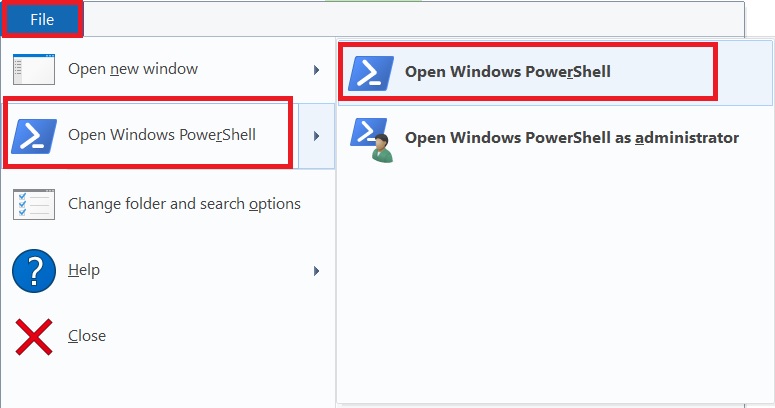
7. Click the "File" tab on the file explorer menu and select "Open Windows PowerShell"


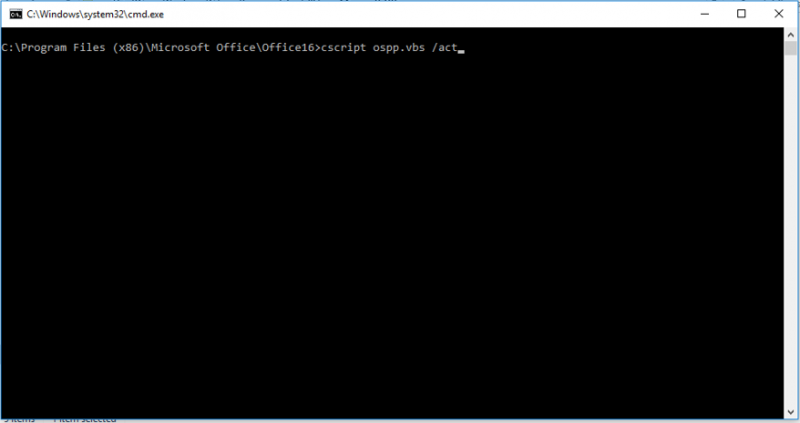
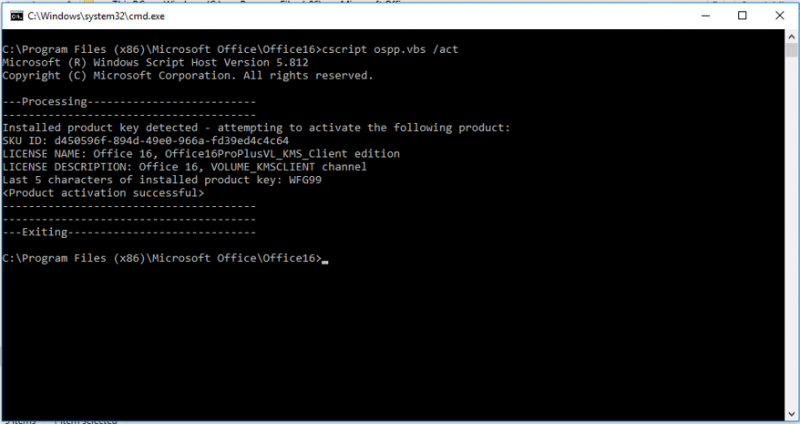
8. When the command prompt opens your cursor should be blinking inside it. Type "cscript ospp.vbs /act" exactly as shown and hit "Enter." 


9. Text should appear and indicate that Microsoft Office is activated. If this is not the case and it still doesn't work, you may need to come to the HelpDesk for a re-install of Microsoft Office. 


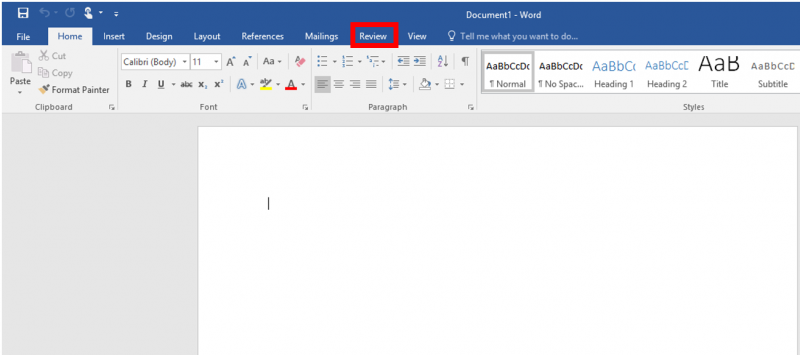
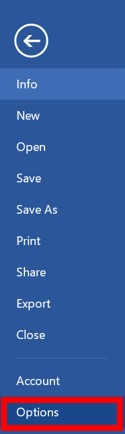
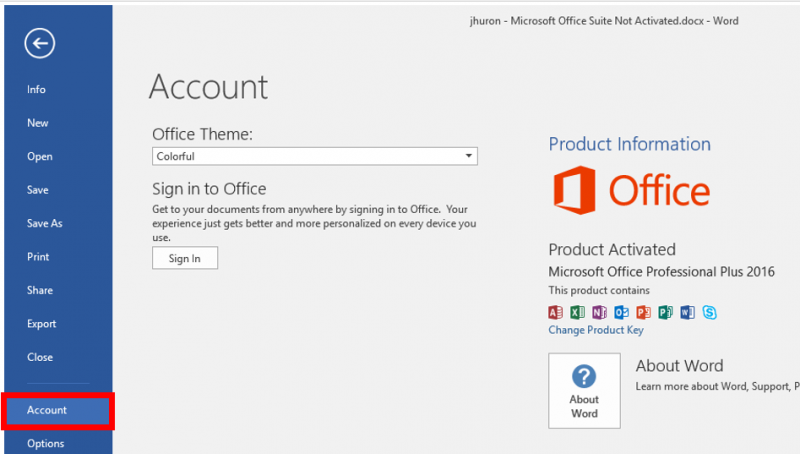
10. Besides pop-up notifications from Word, you can check if your Office suite is activated by clicking the "Account" option in the "File" menu. Ensure that this displays "Product Activated."


11. If it still will not activate after these steps, please bring your laptop in to the HelpDesk. 

Microsoft Expression

Documentation

Microsoft Expression Web 4 is a free program for students through Microsoft Dreamspark. It is a web design software that does not require coding knowledge and is relatively easy to use. You can utilize this program to create web pages for use with your NMU MyWeb. This article will highlight some of the basic functions of Expression Web 4. Select a subject below or review the entire article for a general tutorial. 

We reccomend creating a new site using a template in order to create a more professional-looking page. 

More advanced training is available from Microsoft here
You might also consider taking one of NMU's web design courses through several academic departments. AD 234 is one such course. 

Uploading to MyWeb

​By default, Expression 4 saves the website and associated files into a subfolder within a "My Web Sites" folder in "My Documents." When you are finished, you will have to drag and drop these files into your pub folder if you want them to work for your MyWeb page. Click here for more information on uploading to MyWeb and setting up your pub folder. 

Creating a New Blank Site

  1. With Expression open, select "Site" in the top menu, and select "New Site." 

  2. Select "General" and "One Page Site," then select "OK."

  3. Double-click on "default.html".

  4. The blank site page will now be displayed in the center pane of the screen.

  5. In order to use your site with MyWeb, you must first change some settings. Select the "Site" tab and select "Site Settings."

  6. In the "Site Settings" window, select the "Preview" tab and uncheck "Use Microsoft Expression Development Server." Select "Apply" then "OK."

  7. To change the background color or to make the background a picture or pattern, select "Format" and choose "Background..."

  8. In the "Formatting" tab of the "Page Properties" window, you can select "Background picture" and "Browse" to select for a picture, or you can choose a color from the drop-down menu.
  9. Select "OK" to finish. 

  10. Now you will see your background on the site in the center tab. 

  11. To add a layer in order to enter text or pictures, select the "Draw layer" button in the right layer pane. Click on your webpage and drag to create a layer.

    • Clicking on your layer will reveal small squares that can be used to drag and change the size of your layer. You can move your layer by selecting the edge of it and dragging. 

  12. To insert a picture, click on the "Insert" menu option, hover over "Picture" and select "From File..." to browse for your picture.
  13. Select your picture in the picture browse window and select "Open."

  14. A window titled "Accessibility Properties" will appear. You may enter alternate text or descriptions. Select "OK" to close it. 

  15. You can now resize your picture by dragging at the white squares once it is selected. Move the picture by moving the layer it is in or by clicking the edge of the picture and dragging. 

  16. You can change the alignment, size, or border picture or an image by right-clicking it and dragging it selecting "Picture Properties." Change the settings to your liking and select "OK" to confirm.

  17. You can enter text in a blank layer or in a layer next to a picture by clicking in the layer or next to the picture and typing. There are options for text alignment and color, among others, near the top right of Expression.

  18. To insert a link, highlight the text to link with and select the link icon in the upper right corner. Enter the URL in the "Address" field and select "OK."

  19. To insert a clickable button in a layer, divider, or elsewhere, select the location to insert and click the "Insert" menu option in the top right of Expression. Select "Interactive Button..." from the drop-down menu. 

  20. Select the button you would like from the "Buttons:" list, enter the text to display in the "Text:" field, and enter the URL to link to in the "Link:" field. Select "OK."
  21. To save, select the blue floppy disk button in the top left of Expression. Browse to a save location and select "OK". If prompted to save inserted buttons and pictures, select "OK." 

  22. To preview your website as you work on it, select the "File" menu option, hover over "Preview in Browser," and select a broweser to preview in. The browser will open and display the page. 

Creating a New Site Using a Template

  1. With Expression Web 4 open, select the "Site" menu option and select "New Site"

  2. Select "Templates" and choose a template (a preview is shown to the right) and select "OK."

  3. Select "default.html" from the center pane to open and edit the template. 

  4. Click in text boxes and headings to enter new text. 

  5. To change a picture to another picture, right click and select "Picture Propterties..."

    • Click "Browse" to select a picture, and select "Open" then "OK" to insert it. 
  6. To change an image's size, right click the image and select "Picture Properties."

    • Select the "Appearance" tab in the "Picture Properties" window. Here you can change the size, allignment, and border properties. Select "OK" to apply. 

Make Web Notes with Microsoft Edge

Documentation

Edge lets you make notes on webpages and save them. To learn how, follow the instructions below.

1. With Edge open, click the Web Note icon. 
    

2.You can now use the tools in the upper left to draw, highlight, erase, crop, or write notes, as shown below. 
    

3. Choose where you'd like to save your changes and click "Save." 
    

4. Click the "Exit" button after you save your changes.

5. If you saved your changes to your "Reading List," you can click the Reading List icon to see pages you've made changes to and visit them again. 
    

Installing the Jacobetti Laser Printer

Documentation

As of 9/21/18 the Jacobetti, PEIF, and HelpDesk Laser printers use the same printer settings as the "Library Laser" printer already configured on the NMU Thinkpad and MacBook issued computers. Please use the "Library Laser" printer for the Jacobetti, PEIF, and HelpDesk Laser printers.

If you need to configure a computer to access the printers please see the instructions at the NMU Library web site https://lib.nmu.edu/print.

Inking Feature in Office

Documentation

In Office 2013 and 2016, you can use the Inking tool to draw on Word documents, Excel spreadsheets, and more. This is especially useful with a pen in tablet mode or however you want to use it. To learn more about the Inking tool, visit Microsoft Office's webpage. 


1. Open the Office tool you'd like to use and click the "Insert" tab. 
    

2. Click the "Start Inking" button in the upper right to begin Inking. 
    

How to set Track Changes in Microsoft Word

Documentation

Track Changes is a built in feature in Microsoft Word which allows you to see the changes that were made to the document.
To view changes, or to edit a document with them, follow the instructions below. To learn how to use the comment feature, click here.
 

1. In Word, press the “Review” tab and select “Track Changes” to highlight it and turn it on.
    

2. Begin typing anywhere in the document, making changes, deleting items, or adding parts. Word will track changes to text and formatting. 
 

3. To display comments changes, click the red line to the left of the document. The changes will appear in red. Click again on the line (now grey) to hide the comments.            


4. To keep changes, make sure you save the document. Saving under a different name than the original will help eliminate confusion.

Formatting Word Mail Merge Values in Excel

Documentation

Occasionally some numbers in Excel don't format correctly in Word when using the mail merge feature under the Mailings tab. Follow these steps to resolve this issue before your merge. 


1. First, make sure your ZIP or postal codes don't lose any zeros in the mail merge process by formatting them in your Excel file as text. 
    
2. In Word, click the "File Tab" then click "Options." 
    

3. Choose "Advanced" from the left pane and select "Confirm file format conversion on open." Click "OK." 
    

4. In the mail merge document, click the "Mailings" tab, "Select Recipients," then "Use an Existing List." 
    

5.  Browse to your spreadsheet and double-click it. 

6. Click the "Show all" button in the "Confirm Data Source" window, select "MS Excel Woorkseets via DDE (*xls)" and select "OK." 
    

7. Click "Entire Spreadsheet" then click "OK." 
    

8. Now you can continue with your mail merge

Formatting Images in Word

Documentation

Microsoft Word gives you many options when formatting a document that includes images. This tutorial will give you an overview of those options. 

  1. Once you have your picture on the document (Ctrl+V to paste it in), you can click and drag it around to the desired location.
    • You can click on the picture or select it and then choose the position options in the "Home" tab to center, left align, or right align. 

  2. Once your image is in the desired approximate location, you can select it to see multiple options for formatting the photo and wrapping the text.
    • You can change the angle of the picture by clicking on it and holding and dragging the curved arrow as shown.

      Rotated image

    • You can change the size of the image by clicking and dragging any of the boxes in the corners. 

      Image sizing

    • Clicking and dragging on the boxes in the center around the picture, as shown below, will change the shape of the picture by stretching or compressing it. 

    • Clicking the box that appears to the upper right of the picture you selected will give you many text wrapping options. You can see those options displayed below. 


Flash Fill Feature in Excel

Documentation

Excel offers many tools for you to organize your data.The Flash Fill option will help you format your data quickly.
Below is a step-by-steb guide on how to setup and use Flash Fill.
 

1. Type in the first selection of data the way you would like it to be formatted. In this case, we're concatenating two strings of text.


2. Once you start typing the second selection, Excel will detect what you're trying to do and will provide a preview for the rest of the data formattted this way. 


3. Press Enter and the rest of the data will auto-fill using the Flash Fill feature. 


4. To Accept or Undo Flash Fill actions, click on the small box that appears next to the area that was filled. 
    

Drag and Drop Back Up Method

Documentation

Drag and Drop Back Up Method

There are many ways to back up your computer. The drag-and-drop method is a common one. It is recommended that you do a back-up at least once a month, That way if something were to happen with your computer, you would have most of your files. We recommend using an external USB drive with sufficient space available to store all of your files.


1. Plug in the device you'd like to back up your files to. In our example. It is a Kinston drive with the drive letter of D: Your name and drive letter may be different, depending on what drive you use.


2. Type File Explorer click File Explorer and open a new window.


3. Right-click the File Explorer icon and click "File Explorer" to open a second window.     


4. Drag and resize the second window to the right so it displays on the second half of the screen, next to the previous one. 


5. Navigate in one window to your external device, then in the other window navigate to the locations you would like to copy files from. In this case, click and drag the files from your PC to the external drive. In our example, the target drive is KINGSTON (D): Your external drive may have a different name and drive letter. Repeat the procedure until you've backed up all the desired files. 


We recommend backing up the following folders. You may have others that contain data important to you.

Music

Pictures

Desktop

Documents

Downloads

Favorites

Videos

Backup using File History

  • File History is a handy feature in Windows that helps you protect your personal files and folders from accidental loss or damage. Think of it as a backup system that automatically saves copies of your files, so you can easily restore them if something goes wrong. Whether you accidentally delete a file, make unwanted changes, or experience a technical issue, File History can come to your rescue by allowing you to recover previous versions of your files and folders.
  • One of the great things about File History is that it automatically backs up all your libraries. This includes default libraries like Documents, Pictures, Videos, and Music, as well as any custom libraries you have created. If you have folders elsewhere that you want to back up, you can add them to an existing library or create a new library for them.
  • Setting up File History is straightforward. Once enabled, it continuously monitors your files and folders, making regular backups to an external drive or network location. This means you don't have to worry about manually saving copies of your important documents, photos, videos, or entire folders. If you ever need to recover a file or folder, you can browse through the different versions saved by File History and restore the one you need. It's a simple yet powerful tool that provides peace of mind by ensuring your valuable data is always protected. 
  • Configure File History

  • Here are the steps to configure File History:

  • Connect an external drive or a network location: ensure you have an external drive connected to your computer or a network location configured where you want to save your backups
  • From the Control Panel, under System and Security, select Save backup copies of your files with File History
  • Select Turn on to enable File History


Subscribe to Microsoft