Disable Random Hardware Address in Windows 10

Documentation

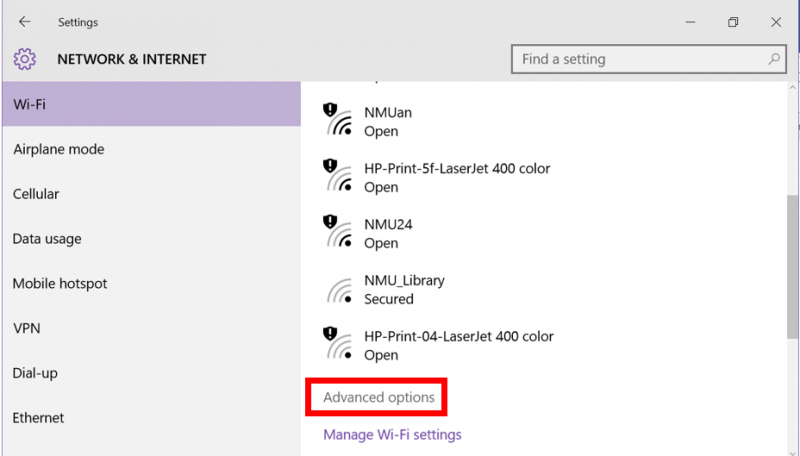
Some application settings or other issues might cause Windows 10 to enable randomized hardware addresses, which will cause issues with your registration to NMU's network. To disable this feature, follow the instructions below.

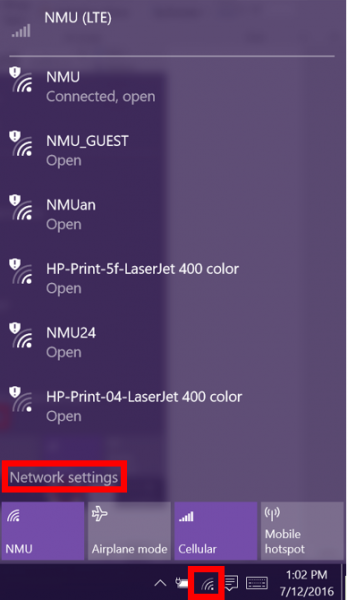
1. Click on the Network Settings icon and select "Network Settings." 
    

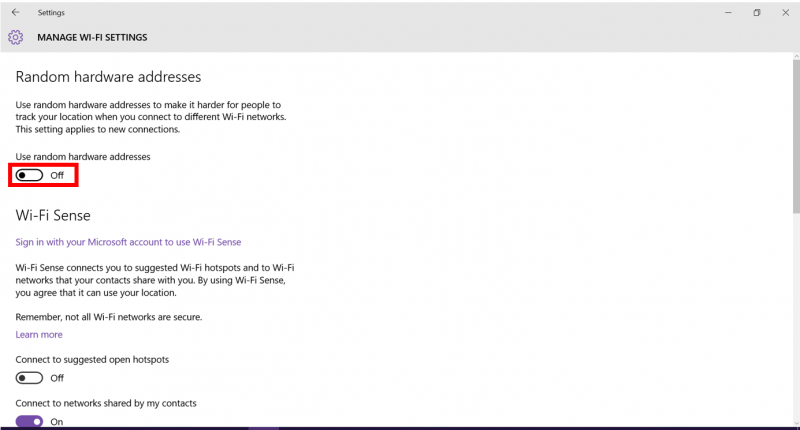
2. In the "WiFi" tab, select "Advanced Options."
    

3. Select "Off" under "Random Hardware Address." 
    

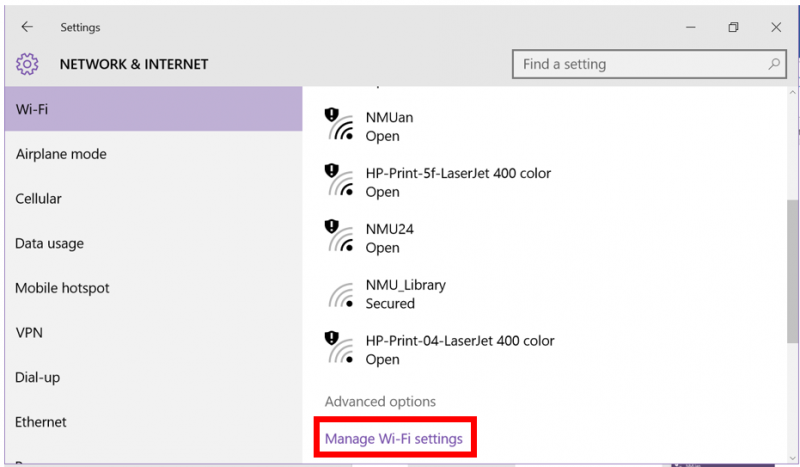
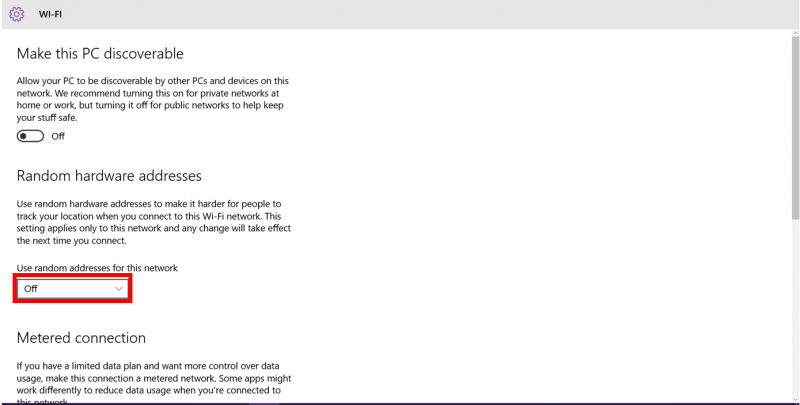
4. In the "WiFi" tab, select "Manage WiFi Settings."
    

5. Select "Off" under "Random Hardware Address." 
    

6. Restart your computer. 

Customizing the Windows Notification Area

Documentation

You can choose what displays on the notification area of the taskbar.


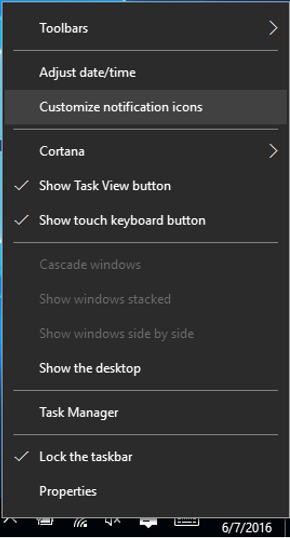
1. Right-click on the date and time display on the taskbar and select "Customize notification icons." 
    

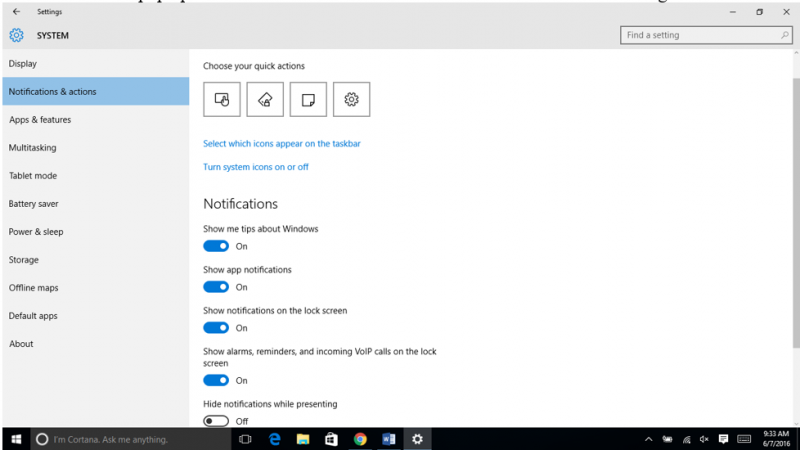
2. There are a few options for customizing your notification icons. You can click "Turn system icons on or off" to see more options or you can turn certian notifications on or off fomr this window. 
    

Windows Update

Documentation

NMU issued desktops and ThinkPad notebooks are configured with Automatic Updates, which means that each computer regularly communicates with a local Automatic Updates server. The server tells the computer what updates are available, and the computer tells you they are ready to be installed. Windows updates are available typically the second Tuesday of each month after 6:00 pm but critical updates might be available more often. It is best to routinely install the updates at a time that is convenient to you since the computer will install them automatically install the next time you restart or turn your computer off and on.


Never turn your computer off when it is installing updates and ensure that it is plugged in if the power is low. If the computer is shut down when installing updates your system will become corrupted. It is important to keep windows up to date to eliminate any software bugs and protect your computer from malicious software. To learn more reasons why you should update, click here

To manually check for and install updates, follow the steps below. Though the screenshots show Windows 10, the steps are similar for earlier versions of windows. 

1. Save and close all open work and windows.

2. In the Windows Start Menu type in and click the "Check for Updates" option in the new window.

3. Click the "Check for Updates" button in the new window and wait while Windows searches Microsoft's update server for available updates.

3. If any are available, they will automatically start to download. 

4. Once the updates are finished downloading you will be prompted to install them. You can either click "Install now" in the open "Update & Security" window, or you can click on the notification in the action center in the charms bar. 


NOTE: Downloading and Installing are two different steps in their own. You download the updates from the Microsoft server, but will have to actually Install them to the computer in order to take advantage of the new features. The newly downloaded updates will not be fully installed to the computer until the computer has been restarted. We recommend restarting the computer as soon as the updates are installed so the installation doesn't happen at a time that is inconvenient for you such as the start of class or when attempting to take an online exam.


5. Once you select the restart option in the prompt, the computer will restart and install the updates. Some updates, large ones or if you haven't updated in a while, will take a fair amount of time. You'll know once the update is completed, when your computer returns you to the login screen. 
 

Changing the Windows Sound Theme

Documentation

The sounds that Windows makes on Startup, when a program is closed, or during other program events can be changed. The following steps outline this process.

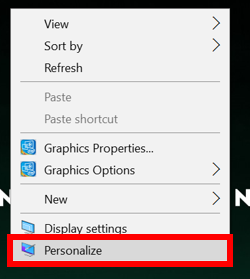
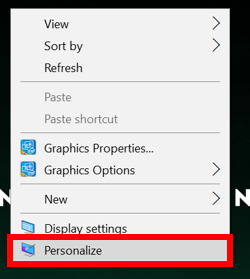
1. Right click on any empty space on the desktop and select "Personalize" from the drop-down menu.


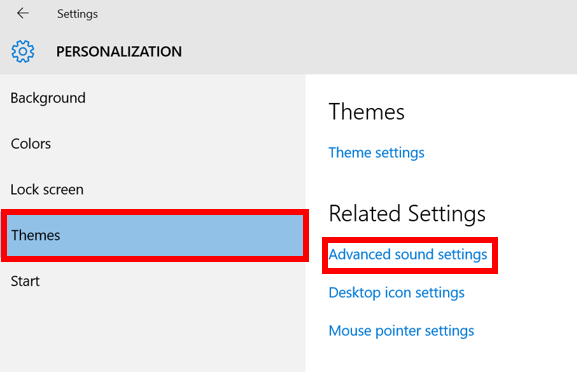
2. In the "Themes" tab of the Personalization window, select "Advanced Sound Settings" under "Related Settings." 
    

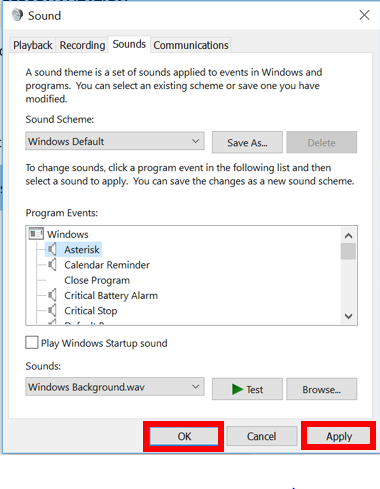
3. A new window will appear. From the "Sound Scheme" dropdown menu, you can select a premade sound scheme. 


  • To hear the sounds, select an item from "Program Events" and click the "Test" button with the green arrow to hear it.

4. Select "Apply" and "OK" when you have selected the desired scheme. 

Changing the Windows Screen Saver

Documentation

The Windows screen saver can be changed to fit your personal preferences and make your computer more secure by requiring the Windows password after a set number of minutes of inactivity. The steps below cover the process of changing the screen saver. 

1. Right click on any empty space on the desktop and select "Personalize" from the drop-down menu. 


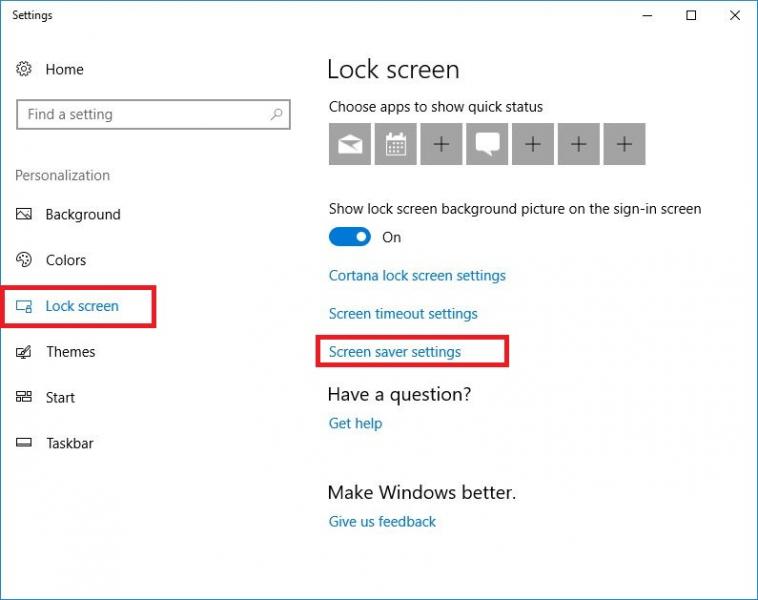
2. Click on the "Lock Screen" option on the left and scroll down the right side of the window and select "Screen saver settings".
    

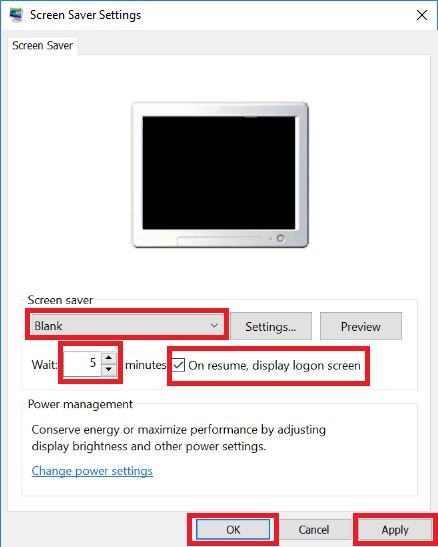
3. In the new window, select the "Screen Saver" option from the pulldown menu. Set the "Wait" time to 5 minutes and check the "On resume, desplay the logon screen" checkbox. Click "Apply" and "OK". This will automatically bring up the screen saver after 5 minutes of inactivity and you will be prompted for the Windows password to use the computer.


4. HELPFUL HINT: You don't have to wait for your screen saver to lock your computer. You can lock your Windows computer at any time by using the "Ctrl-L" key combination. The "Ctrl-L" key combination will work any time you want secure your computer. You don't have to set up the screen saver to use the "Ctrl-L" key combination.

Bookmark Feature in Microsoft Word

Documentation

You can add bookmarks to a document so you can easily find or link to a location. This tutorial uses the Office 2016 version, but can easily be transferrable to Office 2013 and 2010 versions. 

1. Select or highlight a location, picture, or text in your document. 
  
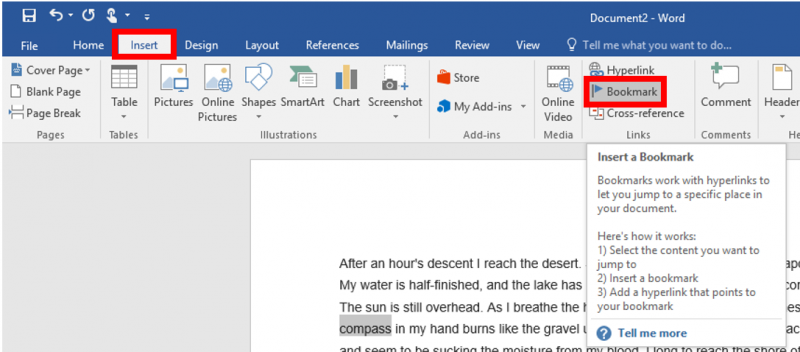
2. In the "Insert" tab on the ribbon menu, within the "Links" group select "Bookmark."


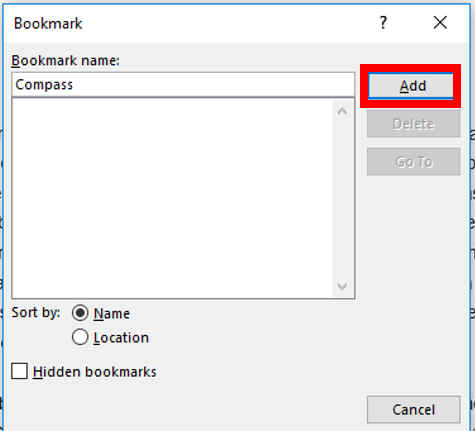
3. Type a name for your bookmark and click "Add." 


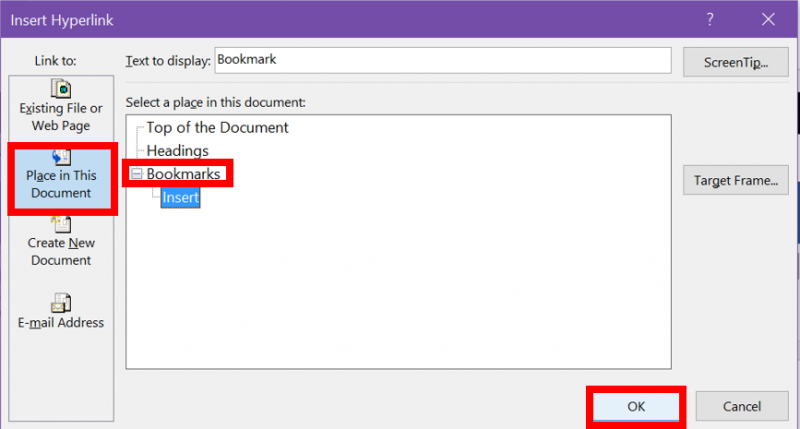
4. To create a link to the bookmark (such as in a list or table of contents at the top of the document), highlight the text you'd like it to link from and "Hyperlink" from the "Insert" tab.


5. Select "Place in This Document" from the left pane, expand "Bookmarks" to select the desired bookmark to link, and click "OK." 


Subscribe to Microsoft